레이블이 iOS6인 게시물을 표시합니다. 모든 게시물 표시

2014/05/17

[iOS] Facebook에 글과 이미지, 링크 등록하기.

iOS6 부터 Facebook에 글을 올릴 수 있는 방법을 제공하고 있습니다.
내부 동작방식은 Twitter에 올리는 것과 동일한 방법에 서비스 타입만 변경하면 됩니다.

Twitter에 글 올리기 

위의 트위터에 글 올리기에 설명한 것과 같이, 이미지와 URL을 추가할 수 있습니다.

 source code
- (IBAction)uploadToFacebook:(UIBarButtonItem *)sender {
    if ([SLComposeViewController isAvailableForServiceType:SLServiceTypeFacebook]) {
        SLComposeViewController *composer = [SLComposeViewController composeViewControllerForServiceType:SLServiceTypeFacebook];
        [composer setInitialText:@"Initial Text for Facebook :)"];//초기 메시지.
        [composer addImage:self.uploadImage]; //추가할 이미지
        [composer addURL:[NSURL URLWithString:APP_URL_IN_ITUNES]];//추가할 URL
        composer.completionHandler = ^(SLComposeViewControllerResult result){
            switch(result) {
                    //  This means the user cancelled without sending the Tweet
                case SLComposeViewControllerResultCancelled:
                    break;
                    //  This means the user hit 'Send'
                case SLComposeViewControllerResultDone:
                    break;
            }
        };
        [self presentViewController:composer animated:YES completion:^{
            //NSLog(@"present completed");
        }];
    }else{
        UIAlertView *alertView = [[UIAlertView alloc] initWithTitle:@"Sorry"
                                                            message:@"You can't upload this page to Facebook right now, make sure your device has an internet connection and you have at least one Facebook account setup"
                                                           delegate:self cancelButtonTitle:@"OK"
                                                  otherButtonTitles: nil];
        [alertView show];
    }
}

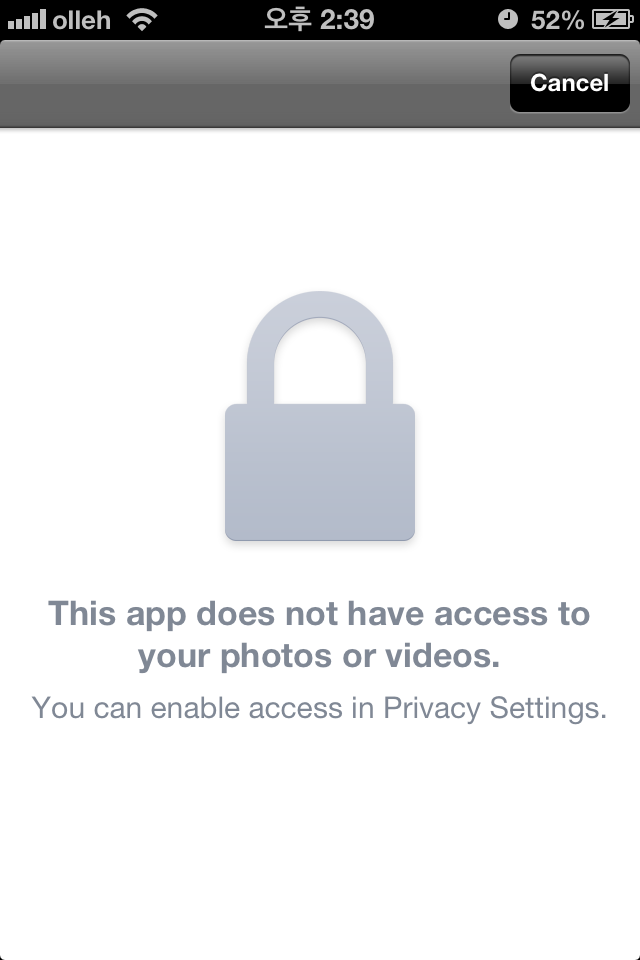
페이스북에 대한 연결이 되어 있지 않은 경우, 아래와 비슷하게 업로드를 할 수 없다고 알려줘야 합니다.
Upload가 불가능함을 알림.
만약, 아이디가 설정이 되어 있으면, 아래와 같이 Facebook Composer가 표시가 됩니다.
페이스북 타입의 SLComposeViewController
이미지를 어느 앨범에 올릴지, 현재 위치를 추가할지, 공개를 어느 범위까지 할지 표시합니다.
만약, 이 화면에서 Post를 했는데, 인터넷 연결이 안되어 있는 경우, 아래와 같이 표시가 됩니다.

Facebook에 Upload하지 못할 경우 표시화면


참고:
- Integrating Twitter and Facebook into iOS7 Applications
- Mobile and Social Network Technology - Tutorial: How to use inbuilt Facebook/Twitter API in iOS6
- iOS Programming 101: Integrate Twitter and Facebook Sharing in Your App.
- Open Source Control For Creating SLComposeViewController Type Views For Any Social Network


2014/05/16

[iOS6] Twitter에 이미지와 링크 올리기

iOS6에서 트위터에 이미지와 글을 올릴 수 있는 방법을 자체 Framework으로 제공하고 있습니다.
Social.framework를 추가하고, social/social.h 를 임포트한 후에 실행 시킬 수 있습니다.

1. 트윗을 보낼 수 있는지 확인하는 코드
  SLComposerViewController의 isAvailableForServiceType 함수를 통해서 확인할 수 있으며, 전송하지 못할 경우, 사용자에게 적절한 문구를 보여줘야 합니다.

2. 전송한 결과값을 받아야 하는 경우
  completionHandler에 블록 함수를 설정해서, 결과를 받아올 수 있습니다.

3. 초기 메시지 추가
 - setInitialText를 통해서 초기 메시지를 넣을 수 있습니다.

4. 이미지 추가
 - addImage : 이미지를 추가할 수 있습니다.

5. URL 추가
 - addURL: NSURL객체를 추가할 수 있습니다.

source code
#import 
@import Social;
...
- (IBAction)tweetThisPage:(UIBarButtonItem *)sender
{
    if ([SLComposeViewController isAvailableForServiceType:SLServiceTypeTwitter]) {
        SLComposeViewController *composer = [SLComposeViewController composeViewControllerForServiceType:SLServiceTypeTwitter];
        [composer setInitialText:@"This is my first tweet in my app!"];
        [composer addImage:[self loadImage]];
        [composer addURL:[NSURL URLWithString:APP_URL_IN_ITUNES]];
        composer.completionHandler = ^(SLComposeViewControllerResult result){
            switch(result) {
                    //  This means the user cancelled without sending the Tweet
                case SLComposeViewControllerResultCancelled:
                    NSLog(@"Canceled");
                    break;
                    //  This means the user hit 'Send'
                case SLComposeViewControllerResultDone:
                    NSLog(@"Tweet Done");
                    break;
            }
        };
        [self presentViewController:composer animated:YES completion:^{
            NSLog(@"Tweet Composer present completed");
        }];
    }else{
        //트위터 아이디가 설정되어 있지 않거나, 인터넷에 연결이 안되어 있는 경우..
        UIAlertView *alertView = [[UIAlertView alloc] initWithTitle:@"Sorry"
                                                            message:@"You can't send a tweet right now, make sure your device has an internet connection and you have at least one Twitter account setup"
                                                           delegate:self cancelButtonTitle:@"OK"
                                                  otherButtonTitles: nil];
        [alertView show];
    }
}

설정에 트위터 아이디가 설정이 되어 있지 않으면, 아래와 같이 표시가 됩니다.
Twitter ID가 없는 경우
아이디가 설정화면에서 정상적으로 설정이 되어 있으면, 아래와 같이 표시됩니다.
설정된 트위터 아이디로 트윗을 작성중.
만약 작성 중에, 인터넷 연결이 끊기게 되면, 아래와 같이 Post를 하였을 때, 표시됩니다.
개발자가 해준 부분은 없으며, 시스템에서 자동으로 표시하는 화면입니다.
트윗을 보내지 못했을 때, 표시화면
위 화면이 표시될 경우에도, completionHandler에는 정상적으로 전송이 되었다고 결과 값을 리턴하게 되므로, 구분을 잘할 수 있어야 겠습니다.

참고:

 트위터 개발자 센터 문서: Integrating with Twitter on iOS
 Ray Wenderlich : Beginning Twitter in iOS6 Tutorial

2013/09/15

[iOS6] App개발에서 사용할 수 있는 Font 목록, 추가 한글 폰트 등록하여 적용하기.

폰트 적용하기.

iOS6에서 한글 폰트는 AppleSDGothicNeo-Medium 과,  AppleSDGothicNeo-Bold가 기본으로 등록되어 있습니다.

이 폰트를 사용하기 위해서는 UILabel이나 UIButton의 폰트로 등록해 주면 됩니다.


//h 파일에서..
@property (weak, nonatomic) IBOutlet UILabel *koLabel;
//m 파일에서..
self.koLabel.font = [UIFont fontWithName:@"AppleSDGothicNeo-Bold" size:17.0f];
//기본으로 AppleSDGothicNeo이므로 별 차이가 없다.


기본적으로 적용되어 있는 System 폰트와 비교를 하면 별 차이가 없습니다.
Label과 button에 적용해서 비교를 해보자. 아래 이미지를 보면, 거의 차기 없는 것 같습니다.

시스템 폰트는 System-Regular(Helvertica), 한글기본 폰트는 AppleSDGothicNeo-Medium입니다

한글 폰트 등록해서 사용하기.

네이버의 NanumGothic과 NanumBrush를 등록해서 표시해 보자. 폰트는 Naver에서 검색하면 나옵니다. (http://hangeul.naver.com/font)
폰트(ttf)파일을 받아서, 프로젝트에 등록하고, ~-info.plist 에 폰트 이름을 등록하고 사용할 수 있습니다.

//h 파일에서..
@property (weak, nonatomic) IBOutlet UILabel *koLabel;
//m 파일에서..
self.koLabel.font = [UIFont fontWithName:@"NanumBrush" size:17.0f];
// Naver의 나눔손글씨 붓 폰트가 적용이 되었다.
적용한 것을 한번 보면.
위에 손글씨 붓 폰트가 적용된 것을 볼 수 있다. 크기를 같게 하면, 손글씨 붓 폰트는 좀 작습니다.

사용가능한 폰트 리스트 가져오기.

현재 디바이스에서 지원 가능한 폰트의 리스트를 읽어서 어떤 것이 지원되는지 확인해 봅니다.
iOS6 Simulator에서는 61개의 font family 이름이 있고, 이것에 각각 Bold나 Medium이 있을 수 있으니, 지원하는 폰트는 61개 정도로 볼 수 있겠습니다.
 //UIFont에서 지원하는 폰트를 알아보자.
 NSArray *fonts = [UIFont familyNames];
 NSLog(@"Available fonts : %@", fonts);

 //Family Name에서 지원하는 폰트 리스트는 아래 함수로 읽어 올 수 있다.
 NSArray *fontList = [UIFont fontNamesForFamilyName:_familyFontName];

  그러면 이제 지원하는 폰트들을 화면에 표시를 해볼까요?


위에 자세히 보면, NanumBrush와 NanumGothic도 사용 가능한 폰트로 등록이 되어서 리스트에 나와 있는 것을 볼 수 있습니다.


2012/12/31

[iOS6] ABAddressBook 연락처 정보 읽어 오기


iOS6에서 사용자의 Address Book에서 연락처 리스트를 읽어와서, 각 연락처를 읽어오는 방법을 정리합니다.
Address Book은 Address Book 프레임워크를 사용하고 있어서, AB라는 접두어를 사용하고 있습니다.

1.  접근 권한 체크
처음 접근을 하면, 사용자에게 접근을 허락할 것인지 입력을 받습니다. 여기서 권한을 승인하거나 거부할 수 있는데, 프로그램에서는 이 권항이 있는지부터 체크를 해야 합니다.
소스
    //접근권한체크하기.
    ABAuthorizationStatus status = ABAddressBookGetAuthorizationStatus();
    if(status == kABAuthorizationStatusDenied ||
       status == kABAuthorizationStatusRestricted)
    {
        NSString *message;
        message = @"연락처에접근할수있는권한이없습니다. 
                   설정 > 개인정보보호 > 연락처에서권한을설정해주세요.";
        //NSLog(@"Location Services Disabled");
        UIAlertView* addrressBookAlert = [[UIAlertView alloc] initWithTitle:@"Error" 
                                                                    message:message 
                                                                   delegate:self 
                                                          cancelButtonTitle:@"OK"
                                                          otherButtonTitles: nil];
        [addrressBookAlert show];
    }
이 권한은 연락처 일기 등을 할 때, 체크해서 보여줘도 되고, 프로그램이 시작할 때, 체크해서 사용자에게 권한을 변경하도록 요청할 수 있습니다.
 카카오톡의 경우는 친구 리스트에 "친구이름표시문제 안내"를 표시하고, 도움말에 설정을 변경할 것을 표시합니다.
 Foursqure의 경우는 위치보기 설정을 해야 정상적으로 표시함을 정보창의 크기로 알려줍니다.


2. Address Book 열기
객체를 ABAddressBookCreateWithOption함수를 통해서 어드레스북 객체를 만든다. 객체가 NULL일 경우, 에러가 난 것으로 권한이 없는지, iOS가 지원하지 않는 버전인지 등등을 체크해야 한다.
 그리고, 접근하기 위해서 ABAddressBookRequestAccessWithCompletion을 통해서 접근 요청을 한다. 여기에서 Block이 사용되고, 접근이 grant되었는지, 에러는 없는지 Block내에서 체크해야 한다.
아래에 myAddressBook은 ABAddressBookRef 타입이다.

- (void) prepareAddressBook
{
    CFErrorRef error;
    myAddressBook = ABAddressBookCreateWithOptions(NULL, &error);
    if (myAddressBook == NULL) {
        //
        if(error == kABOperationNotPermittedByStoreError){
            NSLog(@" not permitted by store");
        }
        /*
         else if(error == kABOperationNotPermittedByUserError){
         NSLog(@" not permitted by User");
         }*/
    }
    
    TCContactManager * __weak weakSelf = self;  // avoid capturing self in the block
    ABAddressBookRequestAccessWithCompletion(myAddressBook,
                            ^(bool granted, CFErrorRef error) {
                                if (granted) {
                                    weakSelf.friendsList = [weakSelf fetchPeopleInAddressBook:myAddressBook];
                                    NSLog(@" load success: %d", [weakSelf.friendsList count]);
                                                     
                                } else {
                                    // Handle the error
                                    NSLog(@" no granted..");
                                }
                            });
}

위에서 접근이 granted된 경우 현재 생성된 ABAddressBookRef 객체를 가지고 아래와 같이 연락처를 가져온다.

3. 모든 연락처 가져오기.
address book에서 모든 사람들의 리스트를 copy해 올려면, ABAddressBookCopyArrayOfAllPeople함수를 사용하면, 내 iOS에 저장된 모든 사람들의 주소가 저장된 순서대로 가져오게 된다.
 모든 연락처가 아닌 Source에 따라서 읽어오려면 ABAddressBookCopyArrayOfAllPeopleInSource 함수를 사용하여 특정 Source에 있는 주소를 읽어 온다.
순서를 가지고 읽어 오게 하려면 ABAddressBookCopyArrayOfAllPeopleInSourceWithSortOrdering 를 사용해서 Source에서 Ordering을 두고 읽어오게 할 수 있다.
아래는 모든 사람들을 읽어오는 예제이다.

// Return a list of people in address book
- (NSMutableArray*) fetchPeopleInAddressBook:(ABAddressBookRef)addressBook
{
    NSMutableArray *list = nil;
    CFArrayRef personList = ABAddressBookCopyArrayOfAllPeople(addressBook);
    long personCount = CFArrayGetCount(personList);
    if( personCount > 0){
        NSLog(@" Person Count:%ld", personCount);
        
        if(list == nil)
        {
            list = [[NSMutableArray alloc] initWithCapacity:personCount];
        }
        for(int i = 0; i < personCount; i++)
        {
            ABRecordRef record = CFArrayGetValueAtIndex(personList, i);
            
            TCContactData* contact = [self getContactDataFrom:record];
            
            if(contact != nil && ![list containsObject:contact]){
                [list addObject:contact];
            }
            
            CFRelease(record);
        }
    }
    CFRelease(personList);
    
    return list;
}
CFArrayRef의 형태로 받아오게 되고, CFArrayGetCount로 읽어온 개수를 알 수 있다.
각 데이터는 ABRecordRef의 형태로 가져올 수 있게 되는데, 이것은 클래스의 형태가 아닌 CF 형태로 되어 있으므로 이것을 Class로 변환을 해야, 관리가 편리하게 된다.
아래에서 ABRecordRef에서 각 데이터를 읽어오는 것을 알아본다.


4. 하나의 record에서 연락처 읽어 오기.
ABRecordRef는 Address book에서 하나의 레코드를 나타내는 것으로 각 레코드의 정보를 읽어오는 함수를 제공한다. (Getting Record Information)
ABRecordGetRecordID
ABRecordID ABRecordGetRecordID (
   ABRecordRef record
);
레코드의 Unique ID를 읽어오는 함수로 현재 레코드의 ID를 읽어올 수 있습니다.

ABRecordGetRecordType
ABRecordType ABRecordGetRecordType (
   ABRecordRef record
);
위에서 각 People이 아닌, 그룹의 리스트를 가져올 수도 있고, Source의 리스트를 받아 올 수도 있어서, 현재 Record의 타입이 뭔지 알수 있어야 합니다.
kABPersonType for person records
kABGroupType for group records.
kABSourceType for source records.

그리고, 각 레코드의 값을 읽어오거나, 설정/제거 할 수 있는 함수를 제공합니다. (Managing Property Value)
ABRecordSetValue
bool ABRecordSetValue (
   ABRecordRef record,
   ABPropertyID property,
   CFTypeRef value,
   CFErrorRef *error
);

레코드에 있는 Property에 값을 설정할 수 있는 함수이다.

ABRecordCopyValue
CFTypeRef ABRecordCopyValue (
   ABRecordRef record,
   ABPropertyID property
);

레코드에 있는 값들을 읽어 오는 함수로, ABPropertyID에 따라서 값들을 읽어 온다. 이 ABPropertyID는 두가지 형태가 있는데, ABPerson과 ABGroup에 따라 다르다. 각각에 Reference에 따라서 값들이 달라지는데, ABPerson을 예를 들면, 전화번호를 보면 kABPersonPhoneProperty로 값을 읽어오면, 아래와 같이 여러가지 종류의 전화번호를 가지고 있을 수 있다.
const ABPropertyID kABPersonPhoneProperty;
const CFStringRef kABPersonPhoneMobileLabel;
const CFStringRef kABPersonPhoneIPhoneLabel;
const CFStringRef kABPersonPhoneMainLabel;
const CFStringRef kABPersonPhoneHomeFAXLabel;
const CFStringRef kABPersonPhoneWorkFAXLabel;
const CFStringRef kABPersonPhoneOtherFAXLabel;
const CFStringRef kABPersonPhonePagerLabel;
그래서, kABPersonPhoneProperty로 읽으면 ABMultiValueRef 형태로 받아오고, 거기에서 위에 값들이 있는지 ABMultiValueCopyLabelAtIndex를 통해서 읽어 올 수 있다. 좀 복잡한데 아래 함수 설명 이후 전화번호 읽는 것을 예제로 보이도록 하겠다.

ABRecordRemoveValue
bool ABRecordRemoveValue (
   ABRecordRef record,
   ABPropertyID property,
   CFErrorRef *error
);

레코드에서 해당 값을 삭제하는 함수로 해당 ABPropertyID를 가지는 모든 Value를 삭제하게 된다.

ABRecordCopyCompositeName
CFStringRef ABRecordCopyCompositeName (
   ABRecordRef record
);

레코드에서 이름을 읽어 오는데, First, middle, last name을 각각 붙여서 읽어 오는 함수이다. Apple Documentation에는 "Returns an appropriate, human-friendly name for the record."라고 되어 있다.

아래 예제는 현재 ABRecordRef에서 전화번호가 있는지 살펴보고, 전화번호가 있으면, 이름과 이미지를 읽어서 TCContactData라는 클래스에 넣고 리턴하는 함수이다.

- (TCContactData*) getContactDataFrom:(ABRecordRef)record
{
    
    ABMultiValueRef phoneRef = ABRecordCopyValue(record, kABPersonPhoneProperty);
    NSString* phoneNumber = nil;
    int phoneRefCount = ABMultiValueGetCount(phoneRef);
    for( int j = 0; j < phoneRefCount; j++)
    {
        CFStringRef labelRef = ABMultiValueCopyLabelAtIndex(phoneRef, j);
        if( CFStringCompare(labelRef, kABPersonPhoneMobileLabel, 0) == kCFCompareEqualTo){
            phoneNumber = (__bridge NSString*)ABMultiValueCopyValueAtIndex(phoneRef, j);
            break;
        }else if( CFStringCompare(labelRef, kABPersonPhoneIPhoneLabel, 0) == kCFCompareEqualTo){
            phoneNumber = (__bridge NSString*)ABMultiValueCopyValueAtIndex(phoneRef, j);
            break;
        }
        /*else if( CFStringCompare(labelRef, kABPersonPhoneMainLabel, 0) == kCFCompareEqualTo){
         contact.phoneNumber = (__bridge NSString*)ABMultiValueCopyValueAtIndex(phoneRef, j);
         break;
         }*/
        CFRelease(labelRef);
    }
    if(phoneNumber){
        TCContactData* contact = [[TCContactData alloc] init];
        
        contact.name      = (__bridge NSString*)ABRecordCopyCompositeName(record);
        contact.firstName = (__bridge NSString*)ABRecordCopyValue(record, kABPersonFirstNameProperty);
        contact.lastName  = (__bridge NSString*)ABRecordCopyValue(record, kABPersonLastNameProperty);
        contact.phoneNumber = phoneNumber;
        
        CFDataRef thumbnail = ABPersonCopyImageDataWithFormat(record, kABPersonImageFormatThumbnail);
        if(thumbnail != nil)
        {
            contact.image = [[UIImage alloc] initWithData:(__bridge NSData*)thumbnail];
            NSLog(@" Name:%@ has image.", contact.name);
            CFRelease(thumbnail);
        }
        return contact;
    }
    
    CFRelease(phoneRef);
    return nil;
} 

위 함수에서 처럼 현재 레코드에서  Person Info Property, Address Property, Date Property, Person Type Property, Phone Number Property, Instant Messaging Keys, Instant Messaging Services, Social Profile Keys, Social Profile Services, URL Property, Related Name Property, Generic Property Labels 등의 정보를 읽어 올 수 있다.

한국과 맞지 않는 체계도 있지만, 전세계적으로 맞출수 있도록 되어 있습니다.
해외 서비스를 위해서는 많은 데이터를 보고, 그 나라 사람들이 사용하는 데이터가 되도록 조합해서 사용해야 되겠습니다.

2012년 마지막 포스팅이 되겠네요.
새해 복 많이 받으세요~
.

2012/12/24

[iOS6] UIImagePickerController 사용하기

사용자가 iOS Device에서 사진을 찍고, 그 이미지를 선택하거나, 사용자의 Photo Library에서 이미지를 선택하는 기능을 UIImagePickerController를 사용해서 구현할 수 있다.

사진을 찍을 수도 있고, Photo Library에서 선택을 할 수 있는데, 현재의 iOS가 지원을 하는지 확인이 필요하다. iPad 2부터는 기본적으로 카메라가 있으므로 구분할 필요가 없겠지만....

소스
    Boolean cameraEnabled = NO;
    Boolean photoLibEnabled = NO;
    if( [UIImagePickerController isSourceTypeAvailable:UIImagePickerControllerSourceTypeCamera]){
        cameraEnabled = YES;
    }
    if( [UIImagePickerController isSourceTypeAvailable:UIImagePickerControllerSourceTypePhotoLibrary]){
        photoLibEnabled = YES;
    }

카메라 촬영이 가능한지, 포토 라이브러리를 접근하는 것이 가능한지를 알 수 있는 함수가 위 2가지 함수이다.
 이 정보를 가지고, ActionSheet를 통해서 새로 찍을 것인지, 기존 것을 선택할 것인지 선택하게 하고, 사진을 찍을 경우와 선택할 경우를 따로  구분해서 UIImagePickerController를 만든다.

소스

카메라를 사용할 수 있고, 지원하는 타입에 이미지 형식이 있을 경우..
    NSArray *mediaTypes = [UIImagePickerController availableMediaTypesForSourceType:
                                            UIImagePickerControllerSourceTypeCamera];
    if ([mediaTypes containsObject:(NSString *)kUTTypeImage]) {
        UIImagePickerController *picker = [[UIImagePickerController alloc] init];
        picker.delegate = self;
        picker.sourceType = UIImagePickerControllerSourceTypeCamera;
        picker.mediaTypes = [NSArray arrayWithObject:(NSString *)kUTTypeImage];
        picker.allowsEditing = NO;
        [self presentViewController:picker animated:YES completion:^{
            NSLog(@"presentViewController completion");
        }];
    }
포토 라이브러리를 사용할 수 있고, 지원하는 타입에 이미지가 있을 경우..
    NSArray *mediaTypes = [UIImagePickerController availableMediaTypesForSourceType:
                                      UIImagePickerControllerSourceTypePhotoLibrary];
    if ([mediaTypes containsObject:(NSString *)kUTTypeImage]) {
        UIImagePickerController *picker = [[UIImagePickerController alloc] init];
        picker.delegate = self;
        picker.sourceType = UIImagePickerControllerSourceTypePhotoLibrary;
        picker.mediaTypes = [NSArray arrayWithObject:(NSString *)kUTTypeImage];
        picker.allowsEditing = NO;
        [self presentViewController:picker animated:YES completion:^{
            NSLog(@"presentViewController completion");
        }];
    }
아래는 이미지를 선택하거나 사진을 찍은 후에, UIImagePickerControllerDelegate로 받는 함수들이다. dismissImagePicker, Cancel, didFinishPickingMediaWithInfo함수가 있다.
- (void)dismissImagePicker
{
    [self dismissViewControllerAnimated:YES completion:^{
        NSLog(@"dismissViewControllerAnimated completion: ");
    }];
}

- (void)imagePickerControllerDidCancel:(UIImagePickerController *)picker
{
    [self dismissImagePicker];
}

- (void)imagePickerController:(UIImagePickerController *)picker didFinishPickingMediaWithInfo:(NSDictionary *)info
{
    //Editing된 이미지를 가져온다.
    UIImage *image = [info objectForKey:UIImagePickerControllerEditedImage];
    //Edit하지 않았으면 원 이미지를 가져온다.
    if (!image) image = [info objectForKey:UIImagePickerControllerOriginalImage];
    if (image) {
        [self setImage:image]; //가져온 이미지를 처리한다.
    }
    [self dismissImagePicker];
}

설명

 왼쪽의 화면이 3가지 종류의 Media Type을 선택할 수 있는 ActionSheet를 표시한 것이다.


UIImagePickerControllerSourceType
The source to use when picking an image or when determining available media types.
와 같이 3가지 종류가 있다.

enum {
   UIImagePickerControllerSourceTypePhotoLibrary,
   UIImagePickerControllerSourceTypeCamera,
   UIImagePickerControllerSourceTypeSavedPhotosAlbum
};
typedef NSUInteger UIImagePickerControllerSourceType;


카메라를 선택할 경우 왼쪽과 같이 카메라를 찍고, 그 사진을 선택할 수 있다.


Photo Library를 이용할 경우, 사용자에게 애플리케이션이 접근하는 것을 허용할 것인지를 묻고, 승인을 받아야 접근할 수 있게 된다.
만약 승인을 하지 않으면, 아래와 같이 접속이 안된다.

사용자가 Photo Library에 접근하는 것을 허용하지 않은 경우 왼쪽과 같이 표시된다.


접근을 허용한 경우, 왼쪽과 같이 화면에 표시가 된다.

SavedPhotosAlbum은 카메라로 찍은 사진들이 저정되어 있는 Camera Roll을 바로 접근하도록 해준다.


2012/12/23

[iOS6] UIActionSheet 사용하기.


사용자에게 선택을 요청할 경우, UIActionSheet를 사용해서 여러 가지 선택을 할 수 있게 요청할 수 있다.

소스

#define STRING_TITLE @"I have a question."
#define STRING_CANCEL @"Cancel"
#define STRING_QUESTION1 @"What is your name?"
#define STRING_QUESTION2 @"Who you are?"
#define STRING_QUESTION3 @"I have no question."
#define STRING_QUESTION4 @"Question4"
#define STRING_QUESTION5 @"Question5"
#define STRING_QUESTION6 @"Question6"
#define STRING_QUESTION7 @"Question7"

- (IBAction)askQuestion:(id)sender
{
    UIActionSheet* actionSheet = [[UIActionSheet alloc] initWithTitle:STRING_TITLE
                                                             delegate:self
                                                    cancelButtonTitle:STRING_CANCEL
                                               destructiveButtonTitle:STRING_QUESTION1
                                                    otherButtonTitles:STRING_QUESTION2, STRING_QUESTION3, STRING_QUESTION4, STRING_QUESTION5, STRING_QUESTION6,STRING_QUESTION7, nil];
    
    [actionSheet showInView:self.view];
}

#pragma mark - UIActionSheetDelegate
- (void)actionSheet:(UIActionSheet *)actionSheet clickedButtonAtIndex:(NSInteger)buttonIndex
{
    NSString *choice = [actionSheet buttonTitleAtIndex:buttonIndex];
    if(buttonIndex == [actionSheet destructiveButtonIndex]) {
        //?
    }
    if([choice isEqualToString:STRING_QUESTION1]){
        //
        UIAlertView *alert = [[UIAlertView alloc] initWithTitle:@"Question"
                                                        message:STRING_QUESTION1
                                                       delegate:self
                                              cancelButtonTitle:STRING_CANCEL
                                              otherButtonTitles: nil];
        [alert show];
    }else if([choice isEqualToString:STRING_QUESTION2]){
        //
        UIAlertView *alert = [[UIAlertView alloc] initWithTitle:@"Question"
                                                        message:STRING_QUESTION2
                                                       delegate:self
                                              cancelButtonTitle:STRING_CANCEL
                                              otherButtonTitles: nil];
        [alert show];
    }else if([choice isEqualToString:STRING_CANCEL]){
        //Do Nothing..
    }
}
-(void) actionSheet:(UIActionSheet *)actionSheet didDismissWithButtonIndex:(NSInteger)buttonIndex
{
    NSLog(@"actionSheet: didDismissWithButtonIndex:%d", buttonIndex);
}
-(void) actionSheet:(UIActionSheet *)actionSheet willDismissWithButtonIndex:(NSInteger)buttonIndex
{
    NSLog(@"actionSheet: willDismissWithButtonIndex:%d", buttonIndex);
}


설명
아래 그림과 같이 5개 이하는 왼쪽 처럼 표시가 되고, 5개 이상이면, 오른쪽 처럼 표시가 된다.


2012/12/19

[iOS6] 큰 이미지를 작게 표시할 때..


큰 이미지를 iPhone의 작은 화면에 표시를 하거나, 작은 이미지로 사용해야 되는 경우가 많다. 이 경우에 이미지를 그대로 사용하게 되면, 이미지 사이즈가 커서 이미지를 로딩하는 메모리도 많이 사용하게 되고, 이미지를 그대로 압축해서 표시하므로, 계단현상이나 부드럽지 못한 이미지가 표시되게 된다.
이런 경우 Context를 생성하고, 거기에 DrawImage를 해서 작은 이미지와 Blend된 이미지로 표시할 수 있다.

소스
- (UIImage*)getResizedImage:(UIImage*)image inBound:(CGSize)size
{
    if (NULL != UIGraphicsBeginImageContextWithOptions)
        UIGraphicsBeginImageContextWithOptions(size, NO, 0);
    else
        UIGraphicsBeginImageContext(size);
    
    CGContextRef context = UIGraphicsGetCurrentContext();
    
    // Flip the context because UIKit coordinate system is upside down to Quartz coordinate system
    CGContextTranslateCTM(context, 0.0, size.height);
    CGContextScaleCTM(context, 1.0, -1.0);
    
    // Draw the original image to the context
    CGContextSetBlendMode(context, kCGBlendModeCopy);
    CGContextDrawImage(context, CGRectMake(0.0, 0.0, size.width, size.height), image.CGImage);
    
    // Retrieve the UIImage from the current context
    UIImage *imageOut = UIGraphicsGetImageFromCurrentImageContext();
    
    UIGraphicsEndImageContext();
    
    return imageOut;
}

설명
UIImage로 받은 큰 사이즈의 원본을 context에 작게 그리고, 그린 Context에서 UIImage를 받아오면, 작게 Blend된 이미지를 추출할 수 있게 된다.

비교


왼쪽이 원 이미지를 그대로 사용한 것이고 오른쪽이 이미지를 작게 렌더링 한 후 표시한 것입니다.
이미지를 캡춰해서 별 차이가 나지 않지만, 실제로 보면, 차이가 나고 메모리 사용량도 차이가 나는 겁니다.
 많이 필요없는 곳에 많은 데이터를 쓰고 있는 것이지요..

[iOS6] UIImageView의 Shadow설정하기.

이미지를 화면에 표시할 때, 사진처럼 보여주기 위해서, 그림자를 설정해야 되는 경우가 많다.
이럴 경우, UIImageView의 CALayer를 이용해서 그림자를 설정해줄 수 있다.
그림자 설정은 테두리 설정과 동시에 사용할 수 있지만, 라운드 처리와는 같이 사용할 수가 없다.
masksToBounds를 설정해서 주변을 Mask처리해야 하므로 그림자 부분이 사라지게 된다.

소스

#import <QuartzCore/QuartzCore.h>
..
- (void)viewDidLoad
{
    [super viewDidLoad];
    
    self.imageView.layer.shadowColor = [UIColor blackColor].CGColor; //그림자 색상
    self.imageView.layer.shadowOffset = CGSizeMake(5.0, 5.0); //그림자 Offset
    self.imageView.layer.shadowOpacity = 0.9f; //투명도
    self.imageView.layer.shadowRadius = 2.0f; //그림자 코너 부분
    self.imageView.layer.backgroundColor = [UIColor blackColor].CGColor;
}

동작 화면
storyboard에서 UIImageView를 등록하고, property로 연결한 다음에, 위와 같이 설정을 하면, 왼쪽과 같이 그림자를 표시할 수 있게 된다.

2012/12/15

[iOS6] UIImageView의 라운드 처리와 테두리 넣기


iOS6에서 UIImageView의 테두리를 넣고, 라운드 처리하는 것을 정리한다.

CALayer속성 변경하기.
- UIImageView는  UIView의 하위 클래스이므로, UIView에 있는 CALayer인 layer의 property를 변경해서 라운드 처리를 할 수 있다.

#import <QuartzCore/QuartzCore.h>
..

UIImageView* imageView = [[UIImageView alloc] initWithImage:[UIImage ....]];
imageView.layer.cornerRadius = 5.0;        //테두리가 라운드가 된다.
imageView.layer.masksToBounds = YES; //테두리의 배경을 투명하게

imageView.layer.borderColor = [UIColor whiteColor].CGColor; //테두리 색상
imageView.layer.borderWidth = 3.0; //테두리의 두께


예제.